Creating a Platformer
Today I’m going to show you how to make your own complete platformer using Psykick2D. This tutorial is going to be written from the perspective of using Browserify to build your game. If you’re using the pre-built psykick2d.js, just replace any instances of require('psykick2d') with Psykick2D and be sure to include your files in the page in the correct order. I would encourage you to make your own namespace, such as Game, so you can attach and reference any custom modules there.
Before getting started, make sure you have the following:
- Node.js
- A folder for your game
- Psykick2D installed:
npm install psykick2d - Browserify:
npm install -g browserify - Alternative: If you prefer using +grunt then you can install the +grunt-browserify module and use that for your build process.
Initialization
First things first, we need to setup the game world. Create a folder called js then create js/main.js.
main.js
var World = require('psykick2d').World;

World.init({
    width: 800,
    height: 600,
    backgroundColor: '#AAF'
});
Next, we need a web page to run the game in. Create index.html and put in the following:
index.html
<!DOCTYPE html>
<html>
<head>
    <title>Platformer</title>
    <style>
        /* Centers the game and dims the screen around it */
        body {
            background-color: #222;
        }
        #psykick {
            margin: 24px auto;
        }
    </style>
</head>
<body>
    <!-- This is what will hold the game -->
    <div id=”psykick”></div>
    <script src=”build/game.js”></script>
    <!--
    If you're using the pre-built, it would look more like this
    <script src=”psykick2d.js”></script>
    <script src=”js/main.js”></script>
    -->
</body>
</html>
Finally, you just need to create the build folder and build your game using Browserify: browserify js/main.js > build/game.js. If you’re using +grunt then just run your grunt task: grunt browserify. Now if you open index.html
Voila!
It doesn’t look like much but now you’ve got the engine running. Give yourself a pat on the back then we’ll get to the fun stuff.
Drawing to the Screen
Before we can start putting our own graphics on the screen, we need a layer to place them on. Everything in Psykick2D resides on layers. For more information about layers, +check out the architecture guide but now all you need to know is that we need a layer to draw on. So in main.js, create a new layer and push it on to the stack.
main.js
var World = require('psykick2d').World;

World.init({ ... });

var layer = World.createLayer();

World.pushLayer(layer);
If you build and run your game now, you won’t see any difference. To fix that, we’ll draw a rectangle to the screen. The rectangle game object and all other game objects are entities which are made up of components. The rectangle entity will then be rendered by a render system.
main.js
var World = require('psykick2d').World,
    Rectangle = require('psykick2d').Components.Shapes.Rectangle,
    RectangleSystem = require('psykick2d').Systems.Render.Rectangle;

World.init({ ... });

var layer = World.createLayer(),
    rectangle = World.createEntity(),
    rectangleSystem = new RectangleSystem();
rectangle.addComponent(new Rectangle({
    x: 0,
    y: 550,
    width: 800,
    height: 50,
    color: 0xFF0000
});

// Tell the system to render the rectangle
rectangleSystem.addEntity(rectangle);

// Tell the layer to use the rectangle system
layer.addSystem(rectangleSystem);

World.pushLayer(layer);
If you rebuild, you should see a rectangle much like this.
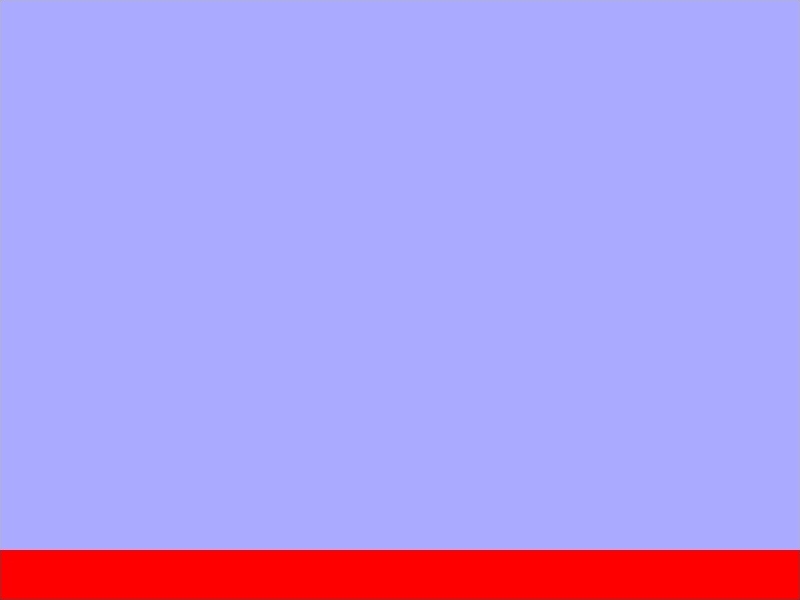
What a nice platform!
Drawing Sprites
Rectangles are fine but sooner or later we’re going to want to use actual graphics. So go ahead and pick up the sample spritesheet and matching JSON file. Create a sprites folder and drop in the terrain.png and terrain.json files.
Through Pixi.js, Psykick2D can automatically load the JSON file and provide easy access to sprites. Before using them, we need to go ahead and preload the sheet:
main.js
var World = require('psykick2d').World,
...
World.init({
    width: 800,
    height: 600,
    backgroundColor: '#AAF',
    preload: {
        spriteSheets: ['sprites/terrain.json'],
        // This is called when everything is loaded
        onComplete: init
    }
});

// Move the initialization code into here
function init() {
    var layer = World.createLayer(),
    ...
    World.pushLayer(layer);
}
If you look inside of terrain.json you’ll notice it’s an object with a property named frames and a series of information about different sprite frames. These names are how we’ll reference the sprites in the game. Now it’s time to basically replace the rectangle with a sprite:
var World = require('psykick2d').World,
    Sprite = require('psykick2d').Components.GFX.Sprite,
    SpriteSystem = require('psykick2d').Systems.Render.Sprite;

...

function init() {
    var layer = World.createLayer(),
        grass = World.createEntity(),
        spriteSystem = new SpriteSystem();
    grass.addComponent(new Sprite({
        frameName: 'grass', // Matches 'grass' in terrain.json
        x: 0,
        y: 568,
        width: 32,
        height: 32
    });
    spriteSystem.addEntity(grass);
    layer.addSystem(spriteSystem);
    World.pushLayer(layer);
}
And after a quick build…
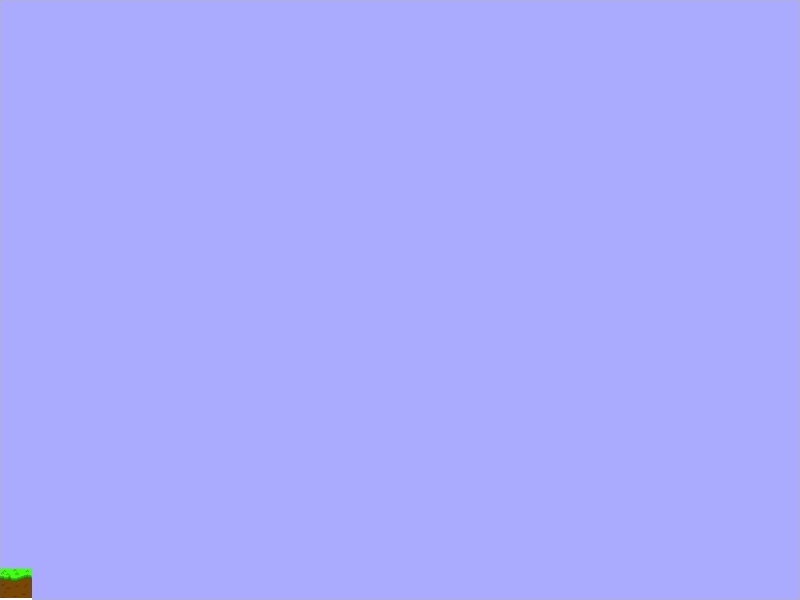
“I can’t see the tile and I’m getting an error about loading sprites/terrain.json!”
Due to security restrictions in various browsers, you can only load files through a server. If you have a local server setup, run it through there. Otherwise, it’s really easy to get a local server going.
If you have Python installed, you can do one of the following:
Python 2: python -m SimpleHTTPServer
Python 3: python -m http.server 8080
Now you can access the game at http://localhost:8080
If you don’t have Python installed, you can run a simple server using the http-server module.
$ npm install -g http-server
$ http-server
Now the game is available at http://localhost:8080
Great! But we probably want more than one tile for the ground. You might be thinking that we’ll need to create a new entity for every single tile but that’s not true. There’s a built in TiledSprite component that’s optimized for exactly this reason. So if we change out a few quick things…
var World = require('psykick2d').World,
    TiledSprite = require('psykick2d').Components.GFX.TiledSprite,
    SpriteSystem = require('psykick2d').Systems.Render.Sprite;
...

function init() {
    ...
    grass.addComponent(new TiledSprite({
        x: 0,
        y: 568,
        width: 800,
        height: 32
    });
    ...
}
What?
The problem here is that +systems require certain components to add an entity. But since we know that the TiledSprite works exactly like a normal Sprite but allows tiling, we can easily mark it as a Sprite component so it will work in the Sprite system.
grass.addComponentAs(new TiledSprite({
    ...
}, 'Sprite');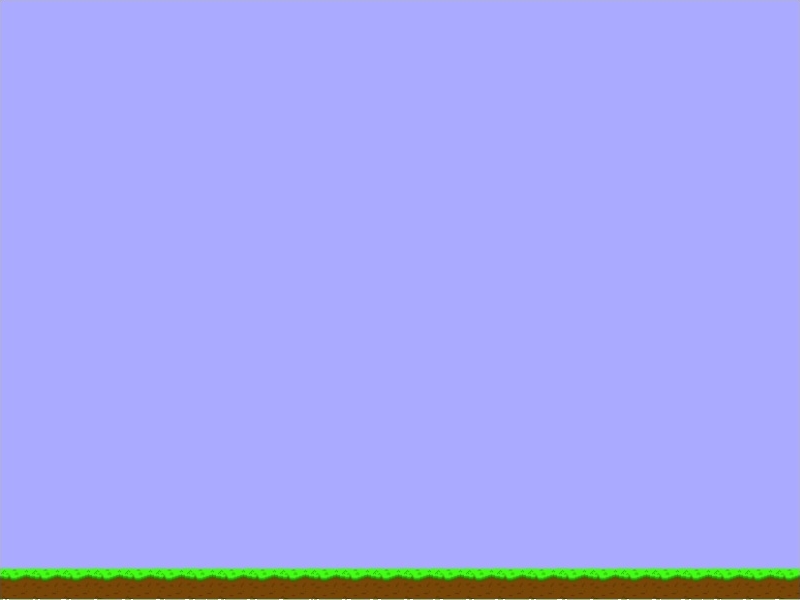
That's more like it
Player Input
Next up, we’re going to add in the player. First, we need to load up the players’ sprite sheet with the matching JSON file.
main.js
World.init({
    ...
    preload: {
        spriteSheets: ['sprites/terrain.json', 'sprites/player.json'],
        onComplete: init
    }
});
Then write up a function for generating the player:
main.js
var World = require('psykick2d').World,
    ...
    Sprite = require('psykick2d').Components.GFX.Sprite;

function createPlayer(x, y) {
    var player = World.createEntity();
    player.addComponent(new Sprite({
        frameName: 'player-stand',
        x: x,
        y: y,
        width: 122,
        height: 56
    });
    return player;
}

function init() {
    ...
    spriteSystem.addEntity(createPlayer(300, 450));
    ...
}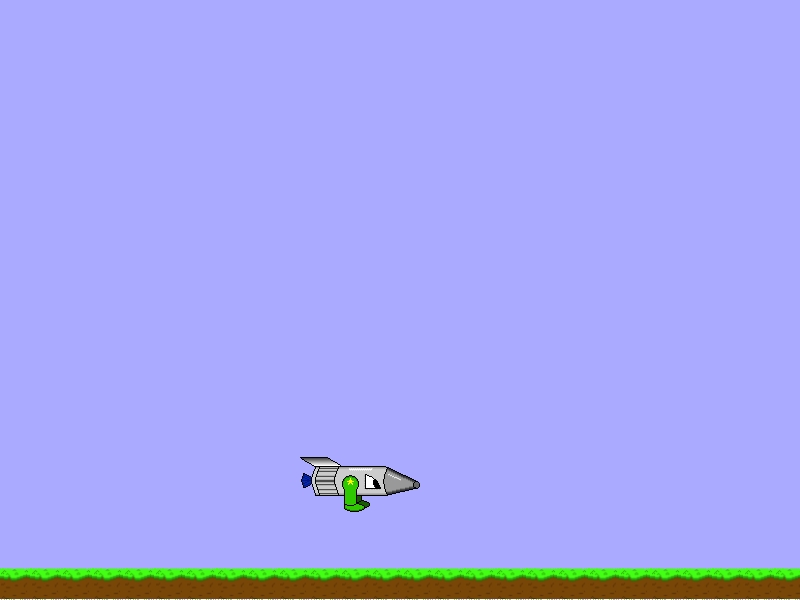
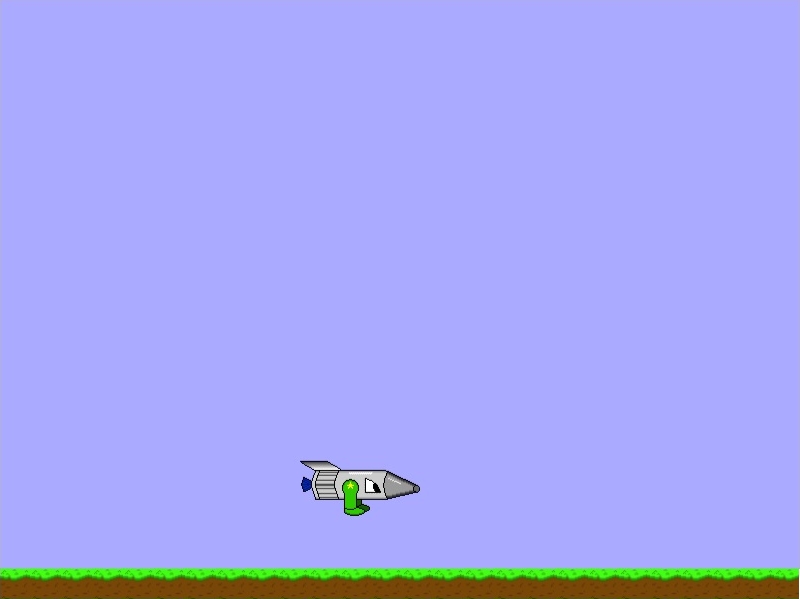
After building the game, you should see the player
But to control the player, we’ll need to write a custom behavior system to do that. Create js/player-input.js and put in the following:
player-input.js
var BehaviorSystem = require('psykick2d').BehaviorSystem,
    Helper = require('psykick2d').Helper;

var PlayerInput = function(player) {
    // Call the BehaviorSystem constructor
    BehaviorSystem.call(this);
    this.player = player;
};

// Shortcut for handling inheritance
Helper.inherit(PlayerInput, BehaviorSystem);

/**
 * Updates the player based on input
 * @param {number} delta    Seconds since last update
 */
PlayerInput.prototype.update = function(delta) {
};

module.exports = PlayerInput;

// If you're going the pre-built route, you should omit module.exports and
// attach it to your personal namespace such as Game
PlayerInput inherits from BehaviorSystem so that it will be run during the update phase of every tick. To use it in the game, just add it to a layer like you did with the Sprite system.
main.js
var World = require('psykick2d').World,
    ...
    PlayerInput = require('./player-input.js');

...

function init() {
    var layer = World.createLayer(),
        grass = World.createEntity(),
        player = createPlayer(300, 450),
        spriteSystem = new SpriteSystem(),
        playerSystem = new PlayerInput(player);
    ...
    spriteSystem.addEntity(player);
    layer.addSystem(playerSystem);
}
One thing that separates the PlayerInput system from other systems is we aren’t using addEntity to add the player. We could have done that and it would work just fine but passing the player directly into the system just saves us the hassle of overriding addEntity or extracting the player from the collection on every update.
Okay, now that we have the system tied in, let’s make it actually do something. Psykick2D automatically supports keyboard (and others) input through the Input namespace. So let’s throw in some simple movement.
player-input.js
var BehaviorSystem = require('psykick2d').BehaviorSystem,
    ...
    Keyboard = require('psykick2d').Input.Keyboard,
    // Collection of key codes
    Keys = require('psykick2d').Keys;

...

PlayerMovement.prototype.update = function(delta) {
    var sprite = this.player.getComponent('Sprite');
    if (Keyboard.isKeyDown(Keys.Left)) {
        sprite.x -= delta * 200;
    }
    if (Keyboard.isKeyDown(Keys.Right)) {
        sprite.x += delta * 200;
    }
};
Now you should be able to move the player around the screen.
Adding in Physics
You may have noticed that, while you can move back and forth, you’re actually floating above the platform. Let’s make the player fall to the ground with gravity. There’s a built-in Platformer physics system built for handling gravity and basic collisions. But the system requires a RectPhysicsBody component. So to avoid having to synchronize data, we’ll just make our Sprite “act” like a physics body.
main.js
var World = require('psykick2d').World,
    Helper = require('psykick2d').Helper,
    ...
    RectPhysicsBody =
        require('psykick2d').Components.Physics.RectPhysicsBody;

...

function createPlayer(x, y) {
    var player = World.createEntity(),
        sprite = new Sprite({
            ...
        });
    Helper.extend(sprite, new RectPhysicsBody({
        mass: 1,
        solid: true,
        friction: 1
    }));
    player.addComponent(sprite);
    player.addComponentAs(sprite, 'RectPhysicsBody');

    return player;
}
Before we throw in the physics system, we need to make sure our platforms are also in the physics system. First, we’ll refactor our tile creation:
main.js
function createGrass(x, y, width, height) {
    var grass = World.createEntity(),
        sprite = new TiledSprite({
            ...
        });
    Helper.extend(sprite, new RectPhysicsBody({
        solid: true,
        immovable: true,
        friction: 30
    }));
    grass.addComponentAs(sprite, 'Sprite');
    grass.addComponentAs(sprite, 'RectPhysicsBody');
    return grass;
}
Now we can finally drop in the physics system and watch it go!
main.js
var World = require('psykick2d').World,
    ...
    PlatformerSystem =
        require('psykick2d').Systems.Behavior.Physics.Platformer;
...

function init() {
    var layer = World.createLayer(),
        grass = createGrass(0, 568, 800, 32),
        player = createPlayer(300, 450),
        playerInput = new PlayerInput(player),
        physicsSystem = new PlatformerSystem({
            width: 10000,
            height: 10000,
            gravity: 30
        }),
        spriteSystem = new SpriteSystem();

    spriteSystem.addEntity(grass);
    spriteSystem.addEntity(player);
    physicsSystem.addEntity(grass);
    physicsSystem.addEntity(grass);

    layer.addSystem(playerInput);
    layer.addSystem(physicsSystem);
    layer.addSystem(spriteSystem);

    World.pushLayer(layer);
}
The last thing to tie it all together is we need to change the player input to adjust the velocity of the player. The Platformer system will move the player based on it’s velocity.
player-input.js
PlayerInput.prototype.update = function(delta) {
    var topSpeed = 15,
        body = this.player.getComponent('RectPhysicsBody');
    if (Keyboard.isKeyDown(Keys.Left)) {
        // Give the player acceleration
        body.velocity.x -= delta * topSpeed;
        if (body.velocity.x < -topSpeed) {
            body.velocity.x = -topSpeed;
        }
    } else if (Keyboard.isKeyDown(Keys.Right)) {
        body.velocity.x += delta * topSpeed;
        if (body.velocity.x > topSpeed) {
            body.velocity.x = topSpeed;
        }
    } else {
        body.velocity.x = 0;
    }
};
Different Platforms
Now that the Earth is pulling the player toward it, we might want to try dropping the player off of some platforms. First, let’s do a little bit of refactoring to make it easier to make different platform types. Make a js/factory.js file and put in the following:
factory.js
var World = require('psykick2d').World,
    Helper = require('psykick2d').Helper,
    Sprite = require('psykick2d').Components.GFX.Sprite,
    TiledSprite = require('psykick2d').Components.GFX.TiledSprite,
    RectPhysicsBody =
        require('psykick2d').Components.Physics.RectPhysicsBody;

var Factory = {
    createPlayer: function(x, y) {
    },
    createGrass: function(x, y, width, height) {
    }
};

module.exports = Factory;
Now just move the createPlayer and createGrass functions out of main.js and into factory.js. Then replace the references in main.js to their factory.js counterparts:
factory.js
var Factory = {
    createPlayer: function(x, y) {
        var player = World.createEntity(),
        ...
        return player;
    },
    createGrass: function(x, y, width, height) {
        var grass = World.createEntity(),
        ...
        return grass;
    }
};
main.js
var World = require('psykick2d').World,
    SpriteSystem = require('psykick2d').Systems.Render.Sprite,
    Platformer = require('psykick2d').Systems.Behavior.Physics.Platformer,
    PlayerInput = require('./player-input.js'),
    Factory = require('./factory.js');

World.init({
    ...
});

function init() {
    var layer = World.createLayer(),
        grass = Factory.createGrass(0, 568, 800, 32),
        player = Factory.createPlayer(300, 450),
        playerInput = new PlayerInput(player),
        platformer = new Platformer( ... ),
        sprite = new SpriteSystem();

    platformer.addEntity(player);
    platformer.addEntity(grass);
    sprite.addEntity(player);
    sprite.addEntity(grass);

    layer.addSystem(playerInput);
    layer.addSystem(platformer);
    layer.addSystem(sprite);

    World.pushLayer(layer);
}
Rather than have the player land on some floating grass, we’ll put in a steel beam.
factory.js
...
createSteel: function(x, y, width, height) {
    var steel = World.createEntity(),
        sprite = new TiledSprite({
            frameName: 'steel',
            x: x,
            y: y,
            width: width,
            height: height
        });

    Helper.extend(sprite, new RectPhysicsBody({
        solid: true,
        immovable: true,
        friction: 25 // Make it just a little slippery
    }));
    steel.addComponent(sprite);
    steel.addComponentAs(sprite, 'RectPhysicsBody');

    return steel;
}
...
main.js
var layer = World.createLayer(),
steel = Factory.createSteel(375, 500, 122, 32),
...
platformerSystem.addEntity(steel);
spriteSystem.addEntity(steel);
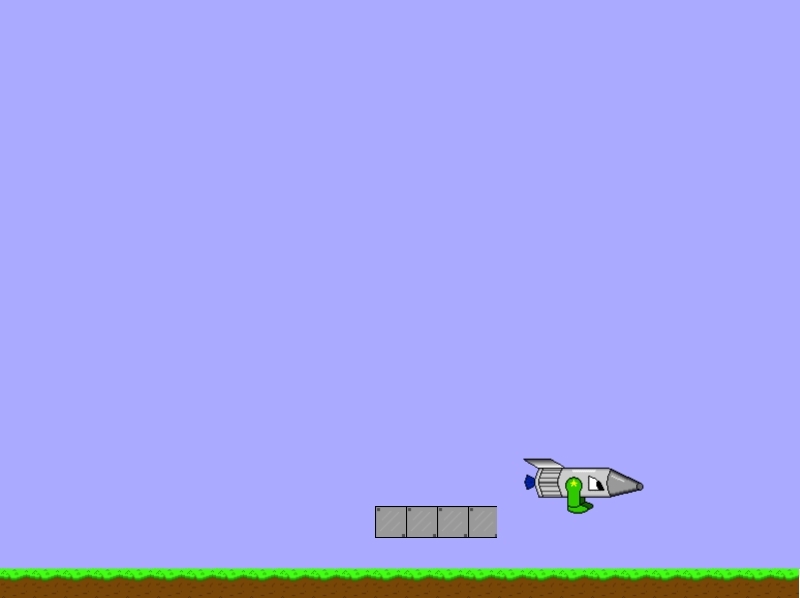
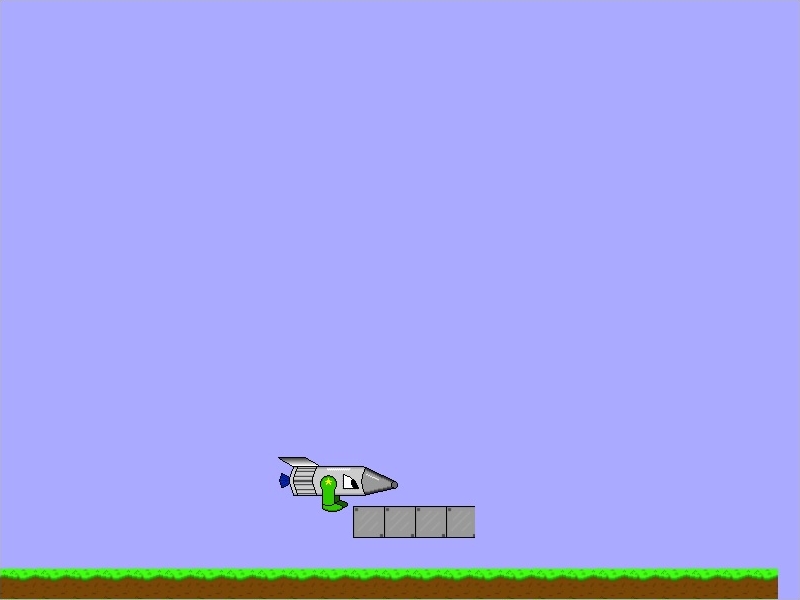
...Now go ahead and try walking off of the beam.
Jumping
Jumping is actually pretty easy to pull off. In the previous section, we applied a horizontal velocity to the player to move them, well, horizontally. We can do the same thing vertically to make the player jump.
player-input.js
PlayerInput.prototype.update = function(delta) {
    . . .
    if (Keyboard.isKeyDown(Keys.Up)) {
        body.velocity.y = -5;
    }
};
For now, the player can jump forever but we’ll fix this later.
Camera
Now that the player has increased mobility, we should make the camera follow them around. To do this, create a js/player-camera.js file with the following:
player-camera.js
var Camera = require('psykick2d').Camera,
    Helper = require('psykick2d').Helper;

var PlayerCamera = function(player) {
    this.playerBody = player.getComponent('RectPhysicsBody');

    // Easy reference for half of the screen size
    this.halfWidth = 800 / 2;
    this.halfHeight = 600 / 2;

    // Tweak these until it looks good to you
    this.xOffset = this.playerBody.width;
    this.yOffset = this.playerBody.height / 2;
};

Helper.inherit(PlayerCamera, Camera);

PlayerCamera.prototype.render = function(stage, delta) {
    // Calculate where the camera should be pointing
    var x = this.playerBody.x - this.halfWidth + this.xOffset,
        y = this.playerBody.y - this.halfHeight + this.yOffset;

    // Think of moving the screen instead of a camera
    stage.x = -x;
    stage.y = -y;
};

module.exports = PlayerCamera;
Then to use it, we attach it to the layer like so:
main.js
var layer = World.createLayer(),
    grass = Factory.createGrass(0, 568, 800, 32),
    steel = Factory.createSteel(375, 500, 122, 32),
    player = Factory.createPlayer(300, 450),
    camera = new PlayerCamera(player),
    ...

layer.camera = camera;

World.pushLayer(layer);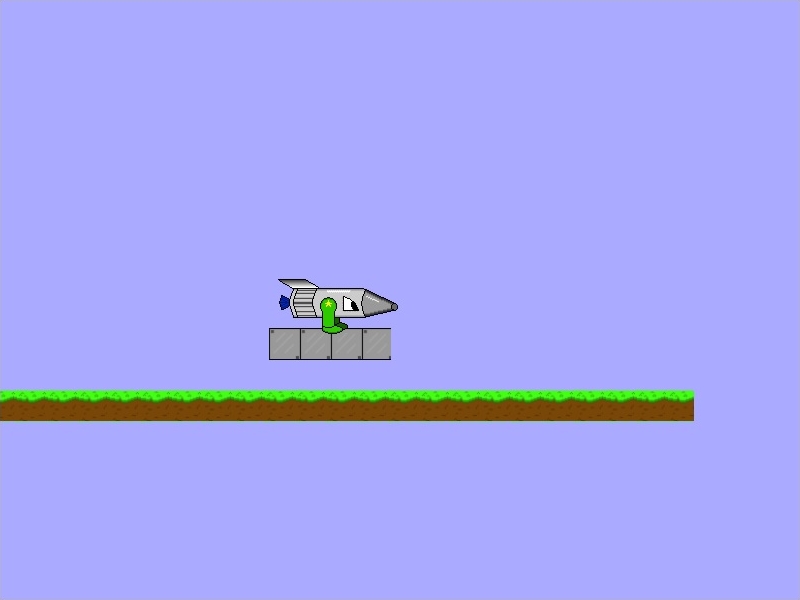
This works fine but it’d be best if the camera didn’t slide below the bottom of the screen. To fix this, we just make sure that x is never negative and y is never positive.
player-camera.js
PlayerCamera.prototype.render = function(stage, delta) {
    var x = this.playerBody.x - this.halfWidth + this.xOffset,
        y = this.playerBody.y - this.halfHeight + this.yOffset;

    if (x > 0) {
        stage.x = -x;
    } else {
        stage.x = 0;
    }

    if (y < 0) {
        stage.y = -y;
    } else {
        stage.y = 0;
    }
};
Player States
Since the camera follows the player to infinity and beyond, now might be a good time to fix that jumping bug. The way we’ll do this is by setting a finite-state machine in the PlayerInput system so we can have states like walking, jumping, and falling. First we’ll say that each state has three stages: enter, exit, and update. Then we can define them like this:
player-input.js
var BehaviorSystem = require('psykick2d').BehaviorSystem,

    ...

    STATES = {
        STAND: 0,
        WALK: 1,
        JUMP: 2,
        FALL: 3
    };

…

var PlayerInput = function(player) {
    BehaviorSystem.call(this);
    this.player = player;
    this.currentState = STATES.STAND;
    this.nextState = STATES.STAND;
};

PlayerInput.prototype._states = {};
PlayerInput.prototype._states[STATES.STAND] = {
    enter: function() {
        var body = this.player.getComponent('RectPhysicsBody');
        body.velocity.x = body.velocity.y = 0;
    },
    update: function() {
        if (Keyboard.isKeyDown(Keys.Left) || Keyboard.isKeyDown(Right)) {
            this.nextState = STATES.WALK;
        } else if (Keyboard.isKeyDown(Keys.Up)) {
            this.nextState = STATES.JUMP;
        }
    },
    exit: function() {}
};
Then we merely update the main update function :
player-input.js
PlayerInput.prototype.update = function(delta) {
    if (this.currentState !== this.nextState) {
        // Have to use 'call' so that 'this' works correctly
        this._states[this.currentState].exit.call(this);
        this._states[this.nextState].enter.call(this);
        this.currentState = this.nextState;
    }

    this._states[this.currentState].update.call(this);
};
If you test it out now, you’ll see that it breaks when we walk or jump. That’s because we still need to define those states:
player-input.js
...

PlayerInput.prototype._states[STATES.WALK] = {
    enter: function() {
        var sprite = this.player.getComponent('Sprite');
        // Flip the sprite depending on if the player
        // is pressing left or right
        if (Keyboard.isKeyDown(Keys.Left)) {
            sprite.pivot.x = 128;
            sprite.scale.x = -1;
        } else if (Keyboard.isKeyDown(Keys.Right)) {
            sprite.pivot.x = 0;
            sprite.scale.x = 1;
        }
    },
    update: function(delta) {
        var body = this.player.getComponent('RectPhysicsBody'),
            sprite = this.player.getComponent('Sprite');
        if (Keyboard.isKeyDown(Keys.Left)) {
            body.friction = 0;
            // Were we moving to the right before?
            if (body.velocity.x > 0) {
                // Flip the sprite
                sprite.pivot.x = 128;
                sprite.scale.x = -1;
            }
            body.velocity.x -= delta * 8;
        } else if (Keyboard.isKeyDown(Keys.Right)) {
            body.friction = 0;
            if (body.velocity.x < 0) {
                sprite.pivot.x = 0;
                sprite.scale.x = 1;
            }

            body.velocity.x += delta * 8;
        } else if (Math.abs(body.velocity.x) <=
                   CONSTANTS.PLAYER.RUN_SPEED * delta) {
            // If we slowed down enough from friction, come to a stop
            this.nextState = STATES.STAND;
        } else {
            // Apply friction so the player slows down when
            // they're not pressing anything
            body.friction = 1;
        }
    }
};

PlayerInput.prototype._states[STATES.JUMP] = {
    enter: function() {
        var body = this.player.getComponent('RectPhysicsBody');
        body.velocity.y = -15;
    },
    update: function(delta) {
        // Start falling if they let go of jump
        if (body.velocity.y < 0 && !Keyboard.isKeyDown(Keys.Up)) {
            body.velocity.y = 0;
        }

        if (body.velocity.y < 0) {
            this.nextState = STATES.FALL;
        }
    },
    exit: function() {}
};

PlayerInput.prototype._states[STATES.FALL] = {
    enter: function() {},
    update: function() {
        var body = this.player.getComponent('RectPhysicsBody');
        // If we're not falling, we must be standing
        if (body.velocity.x === 0) {
            this.nextState = STATES.STAND;
        }
    },
    exit: function(){}
};
This gives us much tighter control over how the player works in each state and makes it a lot easier to add future states (attacking, dying, etc.)
Creating Maps
With all of the basic mechanics working, it’s time to expand our level. Rather than throwing in numerous lines for each platform, let’s make a map file. Map files can be designed any number of ways but this one will be broken up based on types entities. Create a maps folder then create maps/level1.json (if you’re doing this without Node.js, you may want to create this as an object attached to your custom namespace instead of making a JSON file)
level1.json
{
    “player”: {
        “x”: 300,
        “y”: 450
    },
    “grass”: [
        {
            “x”: 0,
            “y”: 568,
            “width”: 800,
            “height”: 32
        }
    ],
    “steel”: [
        {
            “x”: 375,
            “y”: 500,
            “width”: 122,
            “height”: 32
        }
    ]
}
For most entity types, we have an array of objects, each used to create a new tile. The only exception is the player, where we only provide it’s position since this is a single-player game.
Now we just write up a way of “parsing” this map file:
main.js
function init() {
    var map = require('../maps/level1.json'),
        layer = World.createLayer(),
        spriteSystem = new SpriteSystem(),
        physics = new Platformer({
            width: 10000,
            height: 10000,
            gravity: 30
        }),
        player = Factory.createPlayer(map.player.x, map.player.y),
        playerInput = new PlayerInput(player);

    for (var entityType in map) {
        if (entityType === 'player') {
            // Skip the player since we already handled them
            continue;
        }

        var entities = map[entityType];
        for (var i = 0, len = entities.length; i < len; i++) {
            var config = entities[i],
                createEntity = null,
                newEntity;
            // Decide how to create the next entity
            switch(entityType) {
                case 'grass':
                    createEntity = Factory.createGrass;
                    break;
                case 'steel':
                    createEntity = Factory.createSteel;
                    break;
            }

            if (createEntity !== null) {
                newEntity = createEntity(
                    config.x,
                    config.y,
                    config.width,
                    config.height
                );
                spriteSystem.addEntity(newEntity);
                physics.addEntity(newEntity);
            }
        }
    }

    layer.addSystem(playerInput);
    layer.addSystem(physics);
    layer.addSystem(spriteSystem);
}
And now if you run the game you’ll see the exact same thing as before BUT now the world is being populated from the map file. Go ahead and try modifying the map file and create your own level.
Conclusion
You’ve now got all of the key components required to create your own platformer. To really clean it up, you might want to look into adding the Animation system and animating the walk cycle. That is left as an exercise for the reader.
Questions, comments, complaints? Feel free to send me an email at mcluck90@gmail.com. If there’s anything that you feel could be improved or if you’re interested in additional guides, please let me know.